Let’s be honest: apples have a way of sneaking up on you. One moment, you’re at the orchard or store thinking, “I’ll definitely eat all of these!” The next, you’re staring at a mountain of apples that are inching toward overripe territory. The good news? You don’t have to panic or let them go to waste. The freezer is here to save the day.
Freezing apples is surprisingly easy, and once you get the hang of it, you’ll wonder why you didn’t start sooner. Whether you’re planning to bake a pie, blend a smoothie, or make applesauce, having frozen apples on hand is a game-changer. Let’s break it down step by step so you can freeze apples like a pro (or at least feel like one).
Can Apples Really Be Frozen?
Yep, they sure can. In fact, apples freeze really well if you do it right. Their flavor stays intact, though the texture softens a bit after thawing. That means frozen apples are perfect for cooking, baking, or blending—but maybe not the best for eating raw (unless you’re into slightly squishy snacks).
Best Types of Apples for Freezing
Technically, you can freeze any kind of apple, but firmer varieties hold up better in the freezer. Think of apples that are already your go-to for baking—they’re usually a safe bet. Here are some solid options:
- Granny Smith: These tart green beauties keep their shape and flavor.
- Honeycrisp: Sweet, crunchy, and versatile.
- Fuji: Great for freezing and even better for pie.
- Golden Delicious: Sweet, soft, and great for sauces.
If you’re not sure which apples to freeze, just think about how you’ll use them. For pies or crisps, go with firmer apples. For smoothies or sauces, almost any type will do.
How to Freeze Apples: Step-by-Step
The freezing process is pretty straightforward. With a little prep, you can stash away apples for months.
Step 1: Wash Your Apples
Start with a good rinse. You want to get rid of dirt, pesticides, or anything else clinging to the skin. Even if you plan to peel them, washing first is a good habit.
Step 2: Peel and Core (Optional)
Peeling isn’t mandatory, but it can save you some time later if you’re using the apples for baking or sauces. Use a sharp knife or an apple peeler. If you’re freezing whole apples, you can skip this step entirely.
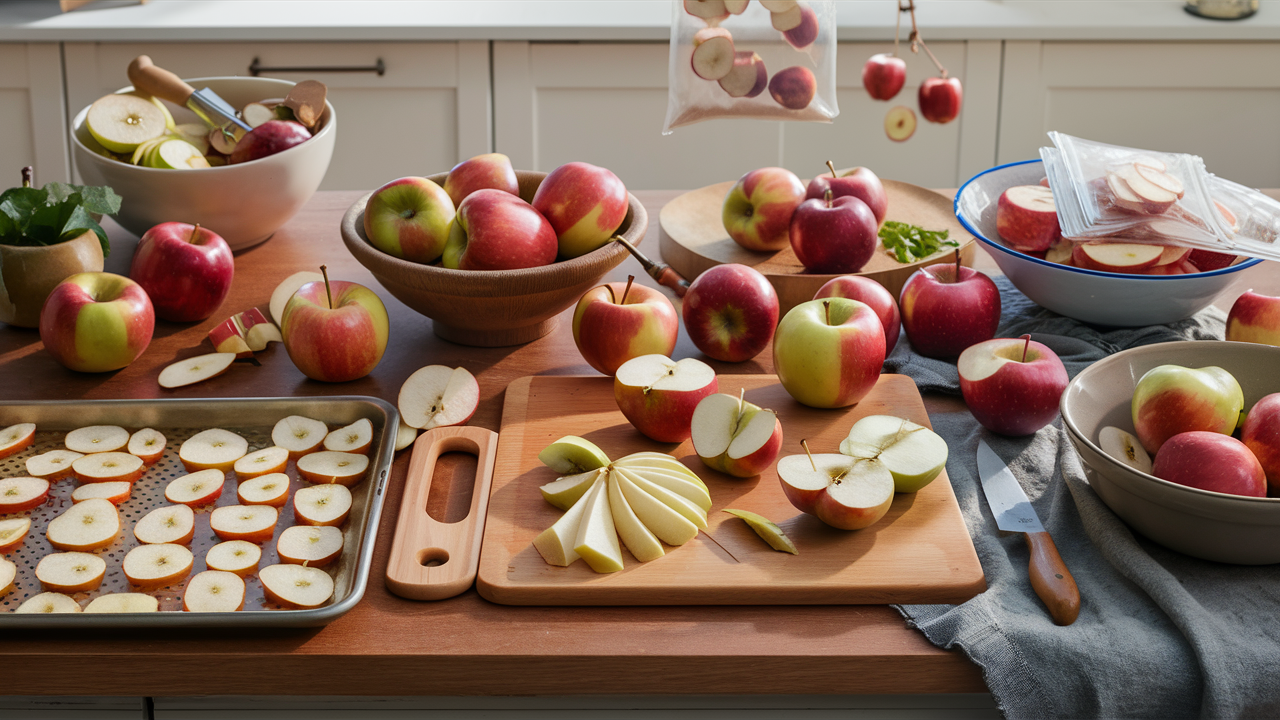
Step 3: Slice or Leave Whole
For most uses, slicing or chopping apples is the way to go. Thin slices are great for pies, while chunks work well for sauces or smoothies. Leaving apples whole is an option, too—just know they’ll take up more freezer space.
Step 4: Prevent Browning
Apples are notorious for turning brown the second you turn your back on them. To keep them looking fresh, soak the slices in a lemon water bath (1 tablespoon of lemon juice per cup of water) for 5-10 minutes. Drain them well before freezing.
Step 5: Flash Freeze
Lay the apple slices or chunks in a single layer on a baking sheet. This is important—if you pile them up, they’ll freeze into a big, solid lump. Freeze the tray for about 2-3 hours, or until the apples are firm.
Step 6: Transfer to Freezer Bags
Once frozen, move the apples into freezer-safe bags or containers. Squeeze out as much air as you can to prevent freezer burn. Label the bags with the date and type of apple, because trust me, in a few months, you won’t remember.
Thawing Frozen Apples
When it’s time to use your frozen apples, the thawing method depends on what you’re making.
- For Pies or Crisps: No need to thaw—just toss the frozen slices straight into your recipe. You might need to adjust baking time slightly.
- For Sauces or Purees: Thaw the apples in the fridge or warm them on the stove. Softened apples are actually perfect for these dishes.
- For Smoothies: Skip thawing altogether. Frozen apple chunks can go straight into the blender.
Pro Tips for Freezing Apples
- Portion for Recipes: Freezing apples in 1-2 cup portions saves you from thawing more than you need.
- Vacuum Seal for Longevity: If you have a vacuum sealer, it’s worth using—your apples will stay fresh longer.
- Label Smartly: Include the date and any extra notes, like “Pie slices” or “Sauce-ready.” Future you will appreciate the clarity.
- Don’t Freeze Bad Apples: If the apple is already bruised or mushy, freezing won’t fix it. Use the good ones.
Common Questions About Freezing Apples
Can I freeze whole apples?
Yes! Just wash and dry them, then pop them in the freezer. You can core them beforehand if you’d like, but it’s not necessary.
How long do frozen apples last?
For the best flavor, use frozen apples within 3-4 months. Technically, they can last up to 6 months, but freezer burn might creep in after a while.
Can I freeze apples without lemon juice?
Sure. Lemon juice helps keep the apples from browning, but it’s not mandatory. If you don’t mind a little color change, you can skip this step.
Why Freezing Apples is a No-Brainer
Freezing apples isn’t just about saving fruit—it’s about saving yourself time and money later. Whether you’re pulling out slices for a pie, chunks for a quick applesauce, or cubes for a smoothie, having frozen apples on hand feels like a little culinary victory.
So the next time you’re staring at a counter full of apples, wondering how on earth you’ll use them all, remember this: your freezer is your best friend. A little effort now means you’ll get to enjoy the taste of fresh apples long after apple season is over.